|
| |
Making your second room |
by nib |
|
There are many tutorials on creating your first room. They are usually deceptively easy.
In a nutshell, they usually say something to the effect of "create a big square brush and click on the Hollow button".
You do that and you're all happy that you've created your first room and think "this stuff is easy". Well, got news
for you, its not that easy. Its easy to hollow out a brush, but the truth is, you won't be hollowing out brushes very
often, if ever, when building a real map that you want to release. So, I've decided to put together this tutorial
to help show you a better way to make rooms.
Now, I want to make something clear, I'm not an expert and there are likely even better and more effecient ways to
make rooms. In fact, I know some people use even a more complex method when building levels. I'm not going to
go into that now because it would make things a lot harder for you than they need to be. My goal in this tutorial
is to get you thinking about a couple key issues while building rooms, not teach you the absolute most advanced and
most effecient method of building a RtCW map.
|
|
| |
I'm assuming you have gone through the "creating your first room" type tutorials and understand what's going on.
I also expect that you know how to apply textures and are familiar with the various 2D views.
|
|
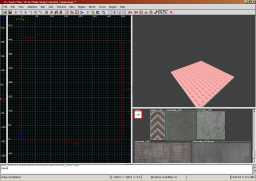
From the Top 2D view, draw a square that is 448 x 448. This will be the floor.
Make sure your texture is the common/caulk texture. You can see the thickness in the Z window on the side. I usually
use an 8 unit grid and make my walls and floors 16 units thick. I know some people swear by 64 units, but I just find
that too big to really work with. Here is a screen shot:
|
|
Next we're going to make a wall. Simply draw a rectangle to the left side
of the floor you just made (see arrow "a" in figure 2a). Now, notice arrow b in figure 2a. See how the brush you just created
is flush with the floor? This is to be avoided. So, raise the brush up a two grid units in the Z-window (see arrow "c" in figure 2a). Finally,
raise the height of the brush to 256 units. See figure 2b to see an "after" shot.
Here is a screen shot:


|
|
So, our next step is to finish creating the remaining 3 walls and the ceiling.
Using gtk it is very easy. With the left wall still highlighted, do the following:
- Press the space bar
- Move the wall to the right side of the floor. Line it up right on the edge just like the left wall.
- Press the space bar
- Click Selection->Rotate->Rotate Z to rotate the wall by 90 degrees on the Z axis
- Move the wall to the top line, lining it up like before
- Press the space bar
- Move the wall to the lower line, linning it up like before
- Press ESC, then select the floor (shift+lclick)
- Press the space bar
- Since the newly created brush is off by one, move it back into position so it lines up with the floor again
- In the z-window, move the brush up until the corners line up (see arrow "a")

|
|
Next, we need to texture the room. Again, this is something that the
other "beginner" tutorials teach incorrectly. The correct way to texture a brush is to hold down shift+ctrl and then
left-click on a brush face. This selects just that one face, NOT the entire brush. With a single face select,
now apply your texture. You can select multiple faces by holding down shift+ctrl+alt while clicking on the faces.
Use this method to apply textures to your inside faces. The screenshots show the inside of the room and the outside
of the room.


|
|
So you're probably asking "Why the hell did I just do all that?? Hollow is so much quicker and easier!".
Well, there are two important lessons to be learned here. First, you don't want to overlap textured brushes if
at all possible. For example, when you use Hollow to make a room, the bottom of the wall brush is actually on
top of the floor brush. That means that when you texture the floor, you end up with a texture actually under
the wall. This is wasteful and increases the compile time. It can also contribute to z-fighting (not going to explain
that here, just know that it is an ugly graphic side-effect of having textures overlapping). Another thing
to think about is that any textured face, visible or not, is processed during the light phase as well. Lighting
is normally the longest phase of compiling so anything you can do to shorten that is a good thing.
The second lesson
to be learned here is that you now only have your inside faces textured. The entire outside of your room is covered
with the caulk texture. This also helps improve compile times. When you simply click on the brush and apply a texture,
the texture is applied to all sides of the brush. The compiler actually process each side that has a texture on it, even
if its not visible by the player. This increases your compile time and makes your vis data size bigger.
So, while the average player might not see a difference between the "basic" method of creating a room and the method I
just showed you, you will reap the benifits of quicker and more effecient comile times.
|
|
second_room_tut.zip
|
|


